Article and Photos by Mark Godlewski
A good understanding of your soil is one of the keys to successful gardening, especially if you are committed to following xeriscape principles. In Part I, I provided some general information about soils in the Okanagan. Here in Part II, I will suggest some methods for evaluating your own particular soil.
From a gardener’s perspective there are three key soil parameters: pH, nutrient level, and texture.
The pH of soils: in the Okanagan basin soils are almost invariably alkaline. This is typical of areas of low to moderate rainfall. Even if you somehow had neutral or acidic soils, our water is alkali so the soils will soon change. This alkalinity is not generally a problem. It gets reduced to some degree by the addition of organic material. The plants that really like acid soil such as azaleas and blueberries also love moisture and so are not good candidates for a xeriscape garden.
The nutrient level of soils: in the Okanagan is variable. The glacial silts and sands of many of our subsoils are low in nutrients and organic content. As a result, most gardens have a fair bit of variability within themselves with respect to nutrients and, in fact, while some xeriscape plants like rich soil, others really prefer poor soil. For plants that like rich soil it is a good idea to constantly add organic material. More about that below.
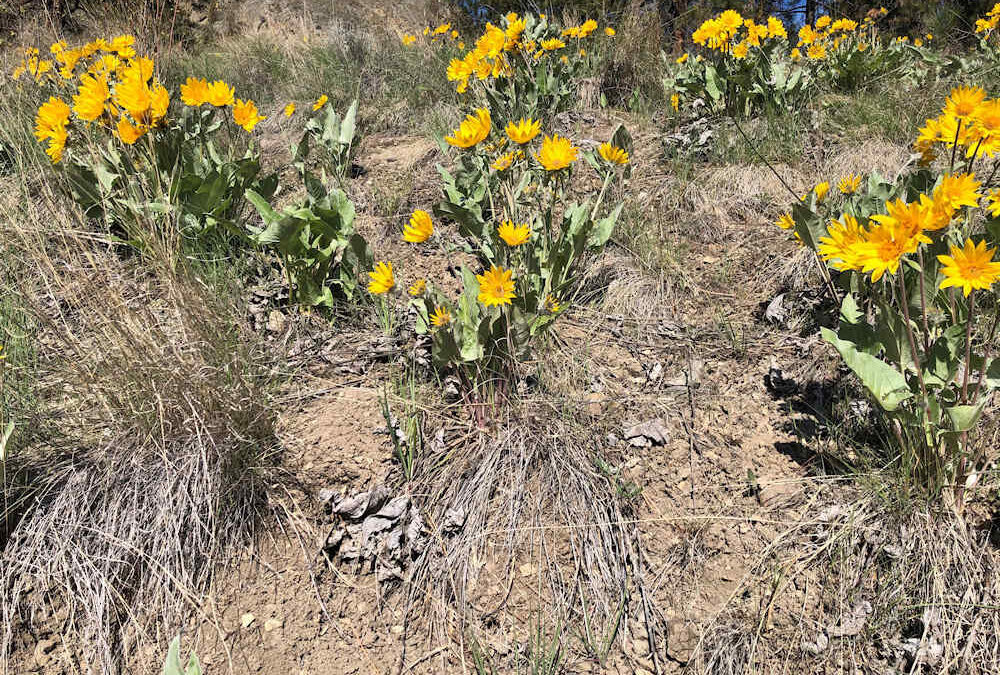
Soil texture: is an important topic for gardeners. Examples of soil textures are sandy loam, silty clay, etc. There are 13 of these terms and they are shown on the soil texture triangle Fig 1. It is worthwhile for every gardener to know their soil texture because it has a strong impact on how you handle the soil, how you irrigate the soil and how well your plants perform. Generally, you would like your garden soil to plot in the parts of the texture triangle that contain the word “Loam”. For example the soil you see in the cover photo of this blog is a sandy loam (Gammil type) in Kalamoir Park.

Fig. 1 – Soil Texture Triangle
To gauge your soil texture, one of the first things you can do is to select a couple sample areas that are representative of your garden. For example, I live in a house with a walkout basement. The elevation of my back garden is lower than the front and the soils are quite different between the front and back because of this elevation difference. Also, after the foundation was finished some sandy fill was brought in and used around the foundation in the front garden. Often backfill just uses the subsoil from digging the basement but it is not uncommon for some of the backfill to be brought in. Although I requested a thick layer of topsoil, it is a bit of a rare commodity in these parts. There are quite a few areas where the landscaper only put in 4-6 inches of topsoil over the subsoil. For my representative sample areas, I have chosen a location in the front garden and one in the back. They are located far away from the foundation, from the hardscaping, and away from any large trees or shrubs that required a lot of digging when they were put in.
In each sample area you want to dig a hole at least 8” in diameter. Do your best to dig down to a depth of about 12”. As you dig note the thickness of your topsoil. There is usually a marked difference in colour and texture between the topsoil and subsoil. The topsoil is almost always darker and more organic. Take a representative sample of the topsoil and subsoil and put it in a plastic bag marked with the location.
Glass jar method for texture – If you look on the web you will find several different sites that explain how to find your soil texture by mixing soil and water in jar and watching how it settles. Although this method is clean and effective for some soils, it has a couple of serious problems. If there are a lot of fine particles (fine sand, silt, and clay) and if they are all similar in colour it can be exceedingly difficult to see the sediment/water contact or the silt/sand contact in your jar at any given time. The bigger problem is that in parts of our valley the glacial clays tend to easily mix with and coat the glacial silts so that they settle together as a single unit in the mixing jar. This means you cannot use this jar method to reliably distinguish between clay and silt and therefore you cannot determine the true texture of your soil. The jar method is somewhat useful, however, in terms of providing a measurement of the quantity of sand and organics in your soil. The sand sinks to the bottom in about 30 seconds and the organics form the darker material that floats on top or settles gently on sediment after a day or so.
Handheld method for texture – This is a better method for estimating soil texture, and it involves getting your hands dirty by playing your soil. The method is well demonstrated in this link from Australia . It is quite effective at estimating relative clay and silt percentages which people often struggle with. Silt can be mistaken for clay, but it is generally more benign. You can get an idea of what the results from this method look like from Fig 2. If you are careful with your observations, you can locate your topsoil and subsoil quite nicely on the texture triangle.

Fig. 2 – Soil Extrusion Textures
Percolation tests for texture – Percolation tests are strongly correlated to soil texture. In many ways, they are the most useful measurement because they are simple and direct. You can perform one easily using the same holes you dug to get the topsoil and subsoil samples. Make certain that the hole has relatively straight sides, is about 12” in diameter and 8”-12” deep. Carefully fill the hole with water and leave it overnight to saturate the soil. The next day fill the hole again and lay a straight edge across the top (see Fig 4). Measure the level of the water down from the straight edge in inches. Come back in an hour and measure how much the water has gone down. You can come back again after two hours and measure again to get the average number of inches per hour for your Perc test. Generally, a rate of between 1 and 4 inches per hour is considered acceptable for most plants.
One thing to keep in mind about percolation tests is that they are affected by shallow water tables. If the water table is within about 20 inches of the bottom of your hole, then it can slow down the percolation flow appreciably.
The effect of texture on irrigation – Your soil texture controls how water permeates your garden. A nice illustration of this (Fig. 3) comes from a particularly useful publication from the University of California Santa Cruz

Fig. 3 – Water Movement in Soil
UnH2O garden – It is interesting to apply these texture analyses to the UnH2O garden. I performed this analysis in two different locations in the garden (Fig 4 and Fig 5) and got similar results. We know from Part I of this blog that the garden is in an area where the subsoil texture should be a loam (sandy loam, loamy sandy, silty loam) which is popular with most plants. On the other hand, the percolation tests in the UnH2O garden gave a drainage of just 1.5 inches per hour which is on the low side of the preferred range. While the texture of the soil is reasonable the problem is that the water table is quite shallow in this part of the city. You can contrast that with my “vegetable garden” in West Kelowna 100m above lake level where I measured a drainage rate of 11 inches per hour. I clearly have a problem with my subsoil in that part of the garden and have plans to fix that immediately.

Fig. 4 – Percolation hole in UnH2O garden

Fig. 5 – Water filled percolation hole
Improving your soil – It turns out that the recipe for improving your soil is remarkably similar for most of our soils in the Okanagan. In almost all cases you should be adding organic matter. If the soil is too sandy add composted organic matter to slow down drainage and improve the nutrient level. If the soil is low in nutrients, again adding organic matter will help considerably. It is a good idea to work some of the organic matter into the soil and lay 3” of organic mulch on top.
Clay soils also benefit from the addition of organic matter to improve the drainage. These soils are difficult to work with, however, because it is hard to effectively incorporate materials such as coarse sand and organics into clumps of clay. Clay soils will hold moisture for longer, but it is hard for many plants to access. Irrigation water can run off instead of penetrating, and walking on wet clay soil leads to over compaction.
If you suspect that you have a problem with a high water table then the best solution may be to build raised beds of loam. This will allow your plant root systems to penetrate as far as they want to get the moisture level that they prefer.
Get to know your own soil characteristics and you will find that your knowledge will pay big dividends in success of your gardening.
I was asking for the average ph of the soil in Kelowna. This article went down a rabbit hole.
So what is tha average ph of soil in Kelowna gardens?
Please.
I come from the coast and our soils are often below 6.
The soil in the Okanagan is alkaline and so is the water we use. This is common for semi arid regions. I would estimate the average PH to be 7.5